Pool Grotto Design Ideas: Planning Your Private Cave Retreat
A pool grotto is a sculpted cave structure built over or alongside a swimming pool, with water cascading over the entrance and an enclosed interior space for seating, shade, or a swim-up bar. That is the core concept. But the difference between a grotto that transforms your pool into something genuinely immersive and one that looks like a pile of bolted-together rock panels comes down to how it is designed and built.
I have hand-sculpted grottos across Missouri, Florida, Texas, and Arizona. Every one started as a conversation about what the client wanted to feel when they stepped inside — not just what it should look like from the pool deck. This article covers the design decisions that matter most, the structural considerations most builders skip, and the features that turn a pool grotto from an expensive decoration into the centerpiece of an outdoor environment.
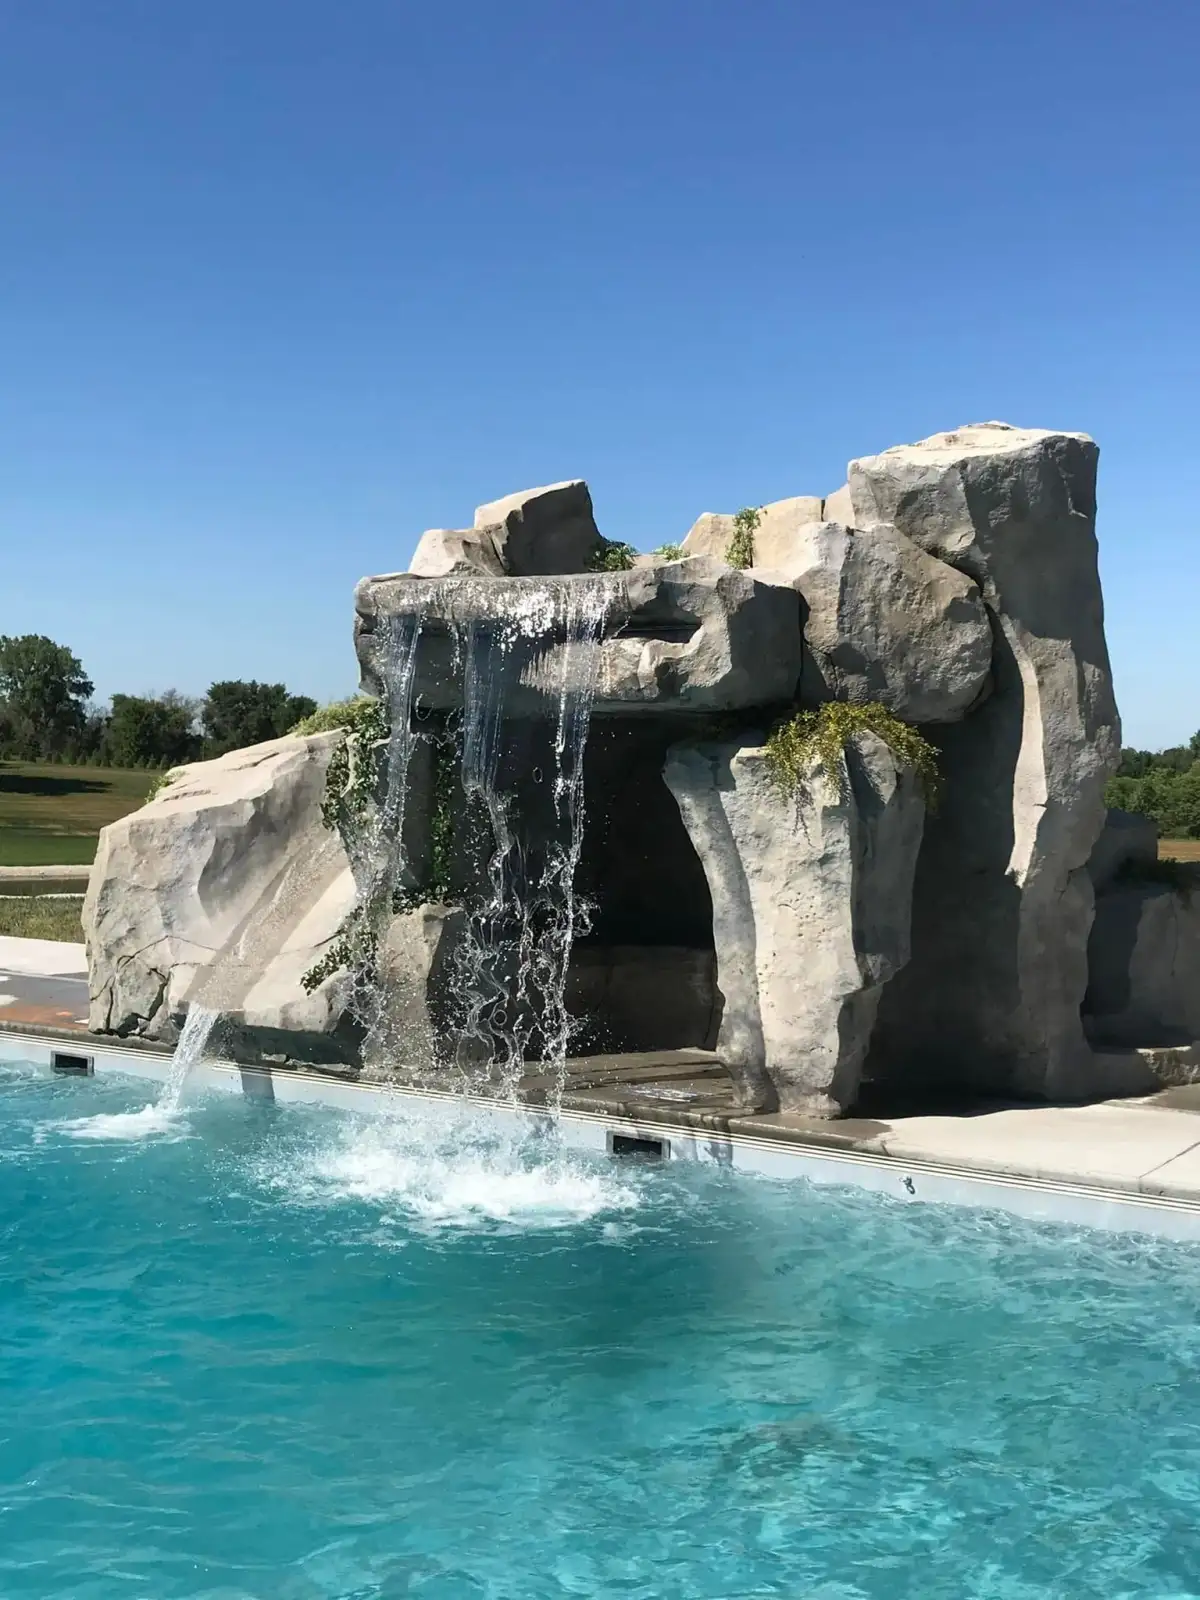
What Makes a Pool Grotto Different from a Waterfall
A pool waterfall is an exterior feature — water cascading down a sculpted rock face into the pool. You look at it from the water. A grotto adds an interior dimension. You walk through the waterfall curtain, step inside, and find yourself in a fully sculpted cave environment with its own lighting, seating, and acoustic character.
That interior space changes the engineering requirements substantially. A waterfall needs structural integrity on the cascade face and proper water flow distribution. A grotto waterfall needs all of that plus interior finishing, overhead load management, ventilation design, lighting conduit, waterproofing on interior surfaces, and often seating shelves or bar counters built directly into the sculpted walls.
Most builders treat grottos as large waterfalls with a hollow space behind them. That approach creates dark, damp, echo-chamber enclosures that nobody actually wants to sit inside. The design has to start from the interior experience and work outward — not the other way around.
Grotto Layout Options
There is no single "grotto template." The layout depends on available space, pool orientation, intended use, and how the feature relates to adjacent structures like decking, slides, and outdoor living areas. Here are the configurations we build most often.
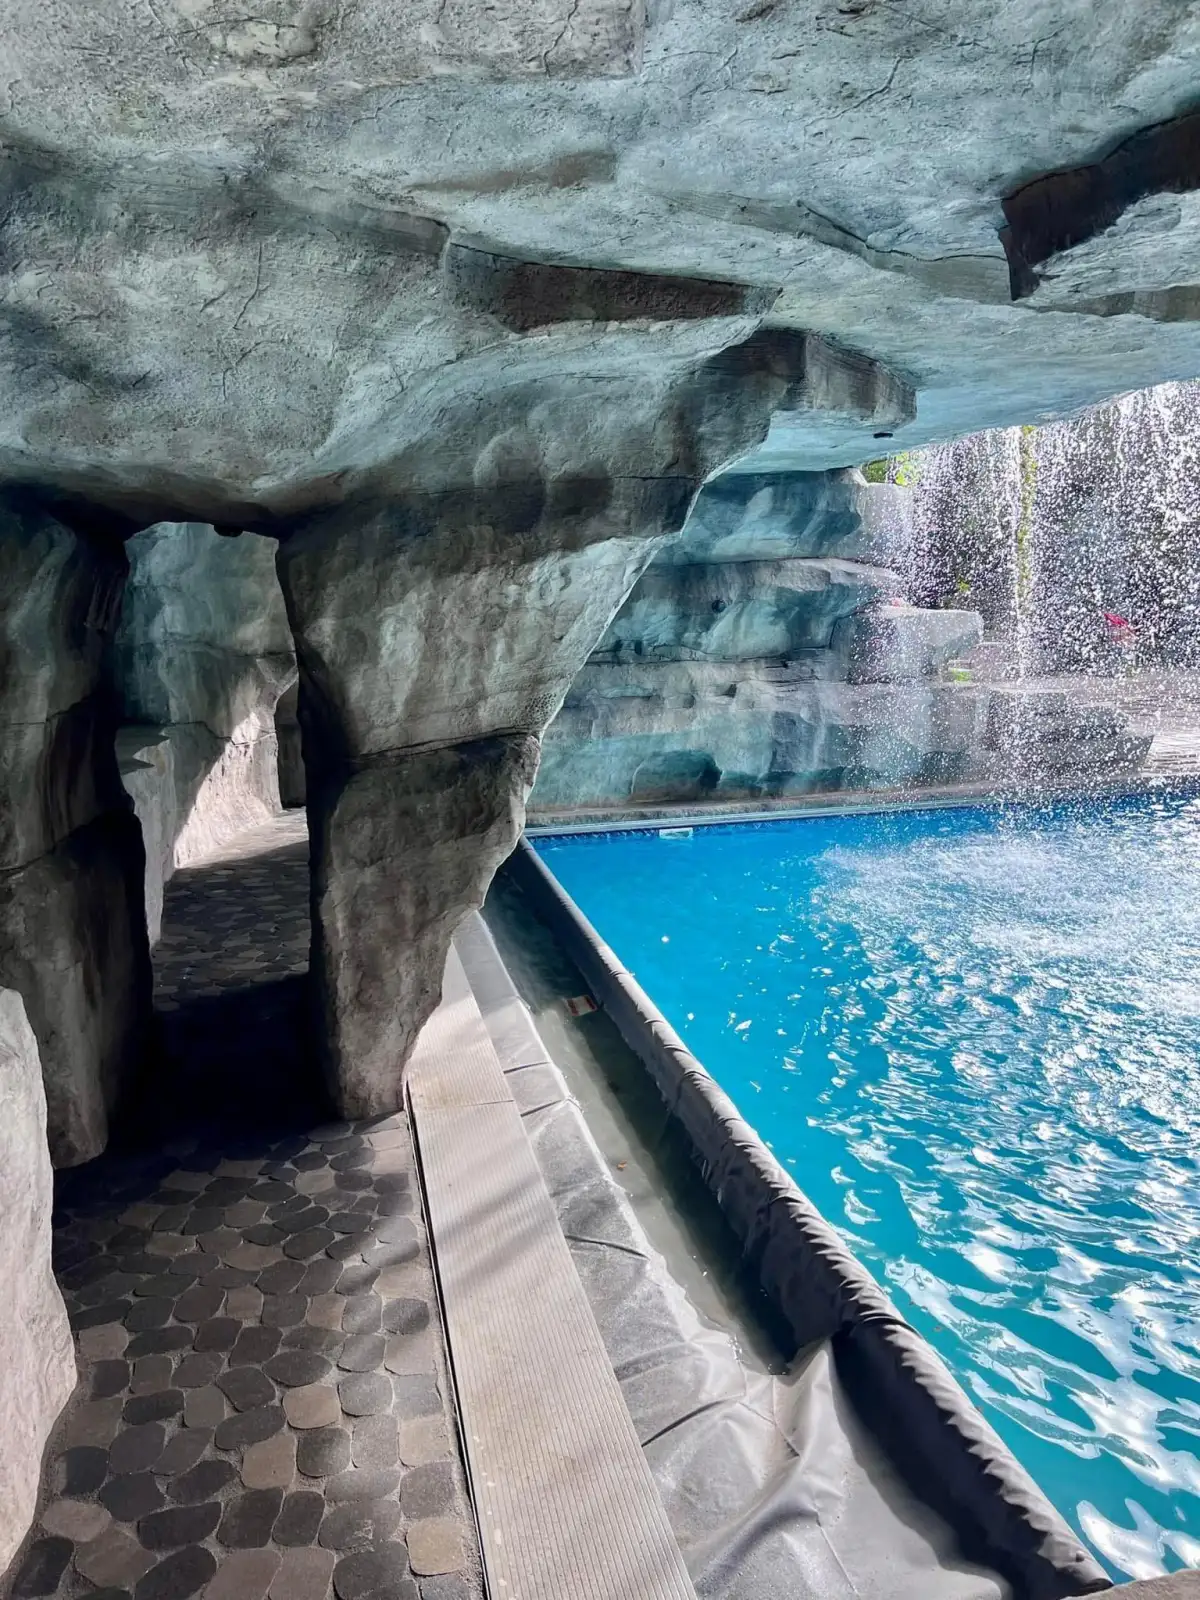
Swim-Through Grotto
The most popular configuration. The entry is at pool water level — you swim under the waterfall curtain into the cave interior. Inside, a submerged bench or shelf allows you to sit at chest depth while water cascades over the entrance behind you. The ceiling is sculpted with stalactite-like formations, and LED lighting creates the cave atmosphere.
Swim-through grottos work best with pools that have at least 12 to 15 feet of available depth on the grotto side, allowing enough room for the interior space without extending too far beyond the pool perimeter.
Walk-In Grotto
Walk-in grottos have a dry or shallow-water entrance from the pool deck rather than from the water. This configuration suits clients who want the grotto experience without requiring everyone to swim to reach it — useful for entertaining and for households with guests who may not be strong swimmers. The interior floor can be a shallow wading area (4 to 6 inches), a fully dry stone deck, or a combination of both.
Grotto with Integrated Slide
For clients building both a grotto and a polished concrete slide, integrating the slide exit through or alongside the grotto structure creates a seamless profile. The slide launches from the top of the grotto rock formation and lands in the pool adjacent to the grotto entrance. This eliminates the visual clutter of a separate slide structure bolted onto the deck and uses the grotto mass as the slide's structural base.
Grotto with Swim-Up Bar
The interior of the grotto includes a bar counter sculpted directly into the rock wall, with submerged bar stools molded into the pool floor. The bar surface is densified concrete — the same treatment we apply to our slide surfaces — providing a smooth, durable finish that handles years of wet use. Plumbing for a sink and electrical for small appliances are routed through the wall cavity during construction.
Critical Design Elements
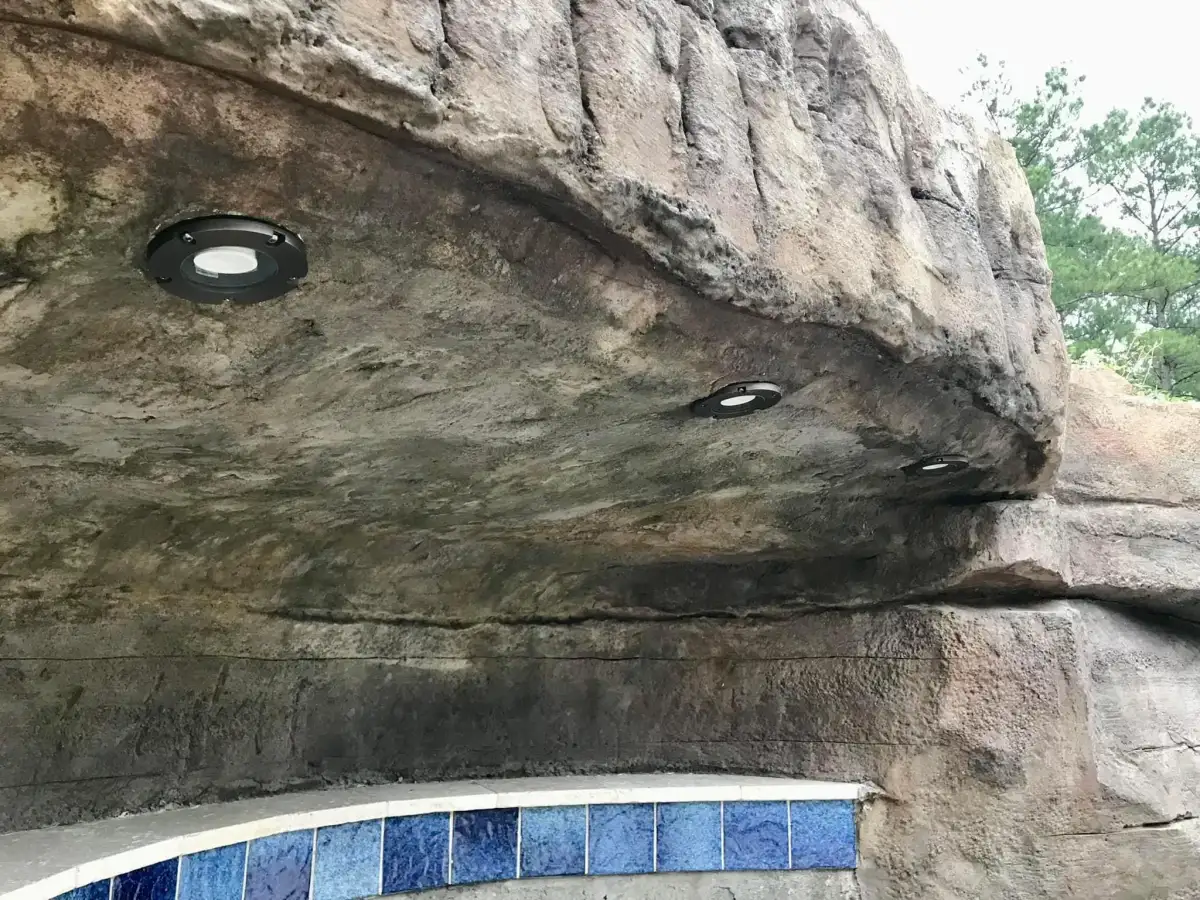
Interior Lighting
Lighting makes or breaks a grotto interior. Without it, the space is a dark hole. With the wrong lighting, it feels like a basement. The goal is to replicate the quality of natural light filtering into a cave opening — warm, indirect, and layered.
We route lighting conduit through the sculpted walls during construction — not after. This means fixtures can be positioned precisely where they create the most dramatic effect: up-lighting behind rock ledges, accent strips along ceiling contours, and submersible fixtures at the waterline to illuminate the cascade curtain from behind. Color-changing LED systems let clients shift the atmosphere from warm amber for evening entertaining to cool blue for a more dramatic cave effect.
Ventilation and Air Flow
A sealed cave with cascading water at the entrance traps humidity and heat. Without airflow consideration, the interior becomes a steam room in summer and develops moisture-related issues over time. Every grotto we build includes designed airflow paths — openings sculpted into the ceiling or upper walls that look like natural rock fissures but function as ventilation channels. In larger grottos, a concealed exhaust fan helps manage humidity during extended use.
Acoustic Treatment
Hard concrete surfaces amplify sound. The waterfall at the entrance adds constant white noise. Inside a poorly designed grotto, conversation becomes difficult and the echo is disorienting. Our mortar sculpting technique creates natural surface variation — irregular layers, pockets, and textured formations that break up sound reflection. The result is a space where the waterfall produces pleasant ambient sound without drowning out conversation at speaking volume.
Seating and Interior Features
Sculpted seating shelves are integrated directly into the grotto walls during construction. These are not aftermarket additions — they are part of the monolithic structure, shaped for ergonomic comfort and finished with the same densification treatment used on our pool slides. Shelf depth, height, and angle are considered during the maquette design phase so the client can evaluate seating positions on the physical model before construction begins.
Other common interior elements include sculpted drink ledges, towel niches carved into the rock face, and recessed speaker housings for integrated audio. Each element is planned during design and built during initial construction — retrofitting any of these features into a finished grotto is destructive and expensive.
Construction Considerations

Structural Engineering
A grotto is not just decorative rock over a pool. It is a load-bearing overhead structure with water flowing across its surface and people sitting beneath it. The engineering standard has to reflect that responsibility. Our grottos use the same 12,000psi fiber-reinforced shell and basalt reinforcement system as every Boulder Legacies feature. The overhead span is engineered for both dead load (the weight of the sculpted rock and water) and dynamic load (the force of cascading water at volume).
Basalt reinforcement is particularly important in grotto construction. The interior surfaces are constantly exposed to moisture, humidity, and — in pool environments — chlorinated splash. Steel rebar in these conditions begins corroding within years, expanding inside the concrete and eventually cracking the structure from within. Basalt fiber is chemically inert to water and chlorine. It does not corrode. The structure remains monolithic for decades.
Waterproofing
Grotto interiors require waterproofing on every surface — not just the cascade face. Water finds paths through capillary action, condensation, and splash. We apply waterproofing membrane to all interior surfaces during construction, then add densification at the waterline and any areas subject to regular water contact. This is the same multi-layer approach detailed in our guide on faux rock versus real rock waterfalls — the material science does not change because the feature has an interior.
Water Flow Design
The waterfall curtain at the grotto entrance needs enough flow to create a continuous sheet of water — gaps in the curtain break the immersion and expose the plumbing manifold behind the cascade lip. But too much flow creates a wall of water that drenches anyone entering or exiting. The balance depends on the entrance width, drop height, and pump capacity.
We design custom manifold systems for each grotto, with multiple flow zones that can be adjusted independently. This lets the client run a full curtain for visual impact, a lighter cascade for easy passage, or selective zones that create windows in the water wall. All manifold hardware is concealed within the sculpted structure during construction.
What to Budget for a Pool Grotto
Every grotto project is priced individually based on scope, site conditions, and design complexity. The same cost factors that apply to waterfalls — size, complexity, site access, and finishing detail — apply to grottos, with the added investment of interior finishing, lighting, ventilation, and seating integration. Compact swim-through designs require less investment than large walk-through environments with integrated bars, slides, and multi-zone lighting.
Every Boulder Legacies grotto project starts with the Design Engagement, which funds your site consultation and a 1-inch-to-1-foot scale maquette. The physical model is especially valuable for grottos because it lets you evaluate the interior space — ceiling height, seating positions, entrance width, and how the grotto relates to your pool and deck — before construction begins. You approve the design in three dimensions, not from a flat rendering.
Where We Build Grottos
Boulder Legacies operates nationally from Southern Missouri. We have built grotto environments in Florida, Texas, Arizona, and across the Midwest. If your project involves a pool grotto, a combined grotto and fire feature environment, or a complete outdoor living transformation, the first step is always the same: a conversation about your space and your vision.